-
By:
- cierra
- No comment
solar panel wiring guide
Solar panel wiring is crucial for efficient energy distribution. Proper connections ensure safety, optimal performance, and reliability. This guide provides essential insights and diagrams for a seamless setup.
1.1 Understanding the Basics of Solar Panel Systems
A solar panel system converts sunlight into electricity through photovoltaic cells. It includes panels, inverters, charge controllers, and batteries. Understanding how these components interact is essential for efficient energy conversion and distribution. Proper wiring ensures safety and optimal performance, making it a critical aspect of any solar setup.
1.2 Importance of Proper Wiring in Solar Energy Systems
Proper wiring is critical for efficiency, safety, and durability in solar systems. It ensures optimal energy flow, minimizes power loss, and prevents electrical hazards. Correct connections maximize system performance and longevity, while adhering to safety standards guarantees reliable energy production and protects investments in solar technology. Precision is key for long-term functionality.
Components of a Solar Panel Wiring System
Solar panels, inverters, charge controllers, and batteries are key components. Wiring diagrams guide connections, ensuring energy flows safely and efficiently through the system.
2.1 Solar Panels and Their Connections
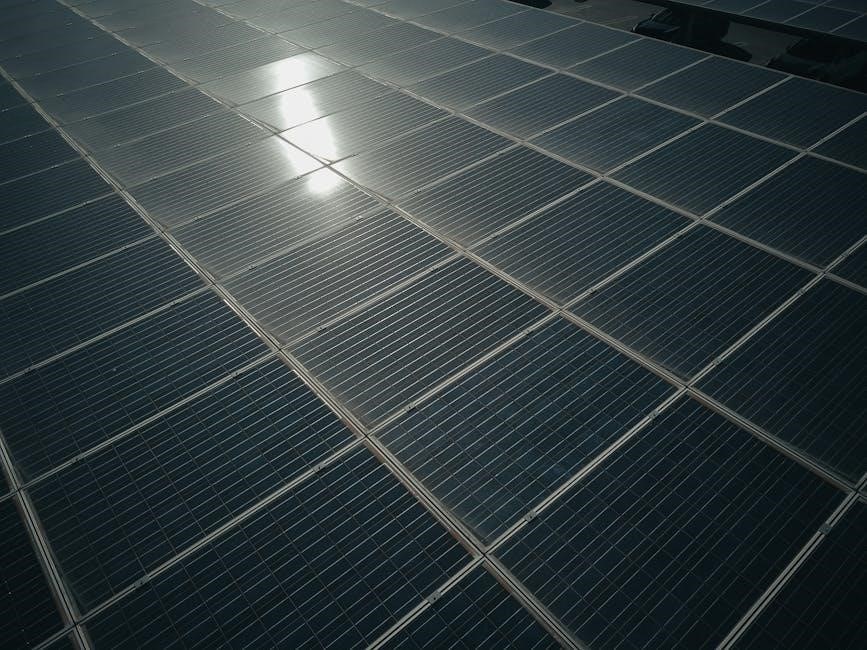
Solar panels are the foundation of any wiring system. They generate power through photovoltaic cells. Panels can be connected in series or parallel to achieve desired voltage and current levels. Proper connections ensure maximum energy output. Always follow wiring diagrams to avoid short circuits and ensure safe, efficient energy transfer to inverters or charge controllers.
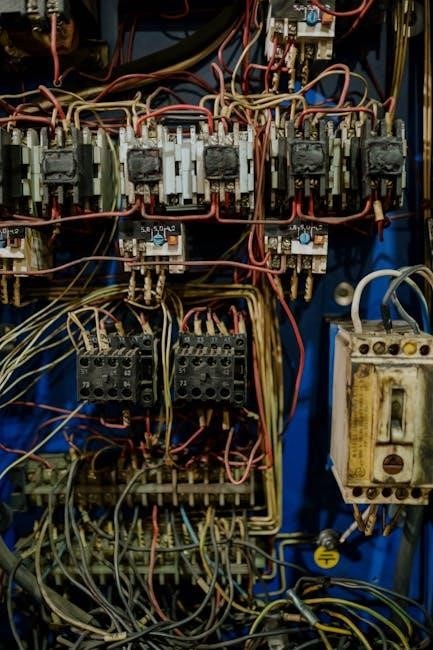
2.2 Inverters, Charge Controllers, and Batteries
Inverters convert DC power from solar panels to AC for household use. Charge controllers regulate energy flow to batteries, preventing overcharging. Batteries store excess energy for nighttime or cloudy days. Proper integration of these components ensures efficient energy management and reliable power supply.
2.3 Wiring Diagrams for Solar Panel Systems
Wiring diagrams are essential for understanding connections between solar panels, batteries, inverters, and electrical loads. They provide a clear visual guide, ensuring safe and efficient installation. Whether for off-grid or hybrid systems, diagrams help users and professionals achieve optimal setups, aiding in troubleshooting and future upgrades.
Series vs. Parallel Wiring for Solar Panels
Series wiring boosts voltage, ideal for high-voltage systems, while parallel wiring increases current, suitable for low-voltage applications. Both configurations optimize energy output for specific needs.
3.1 Advantages of Series Wiring
Series wiring increases system voltage, reducing current, which minimizes energy loss and allows for smaller wiring. It’s ideal for high-voltage applications, simplifying inverter compatibility and enhancing overall efficiency. This setup is cost-effective and reduces material needs, making it a popular choice for solar installations requiring higher voltage outputs.
3.2 Advantages of Parallel Wiring
Parallel wiring maintains lower system voltage while increasing current, ideal for charging batteries. It offers flexibility, allowing panels to operate independently, and minimizes system downtime. This configuration is suitable for variable shading conditions and scalable systems, ensuring consistent energy production and easier expansion of solar setups over time.
3.3 Choosing the Right Configuration for Your System
Selecting the right wiring configuration depends on your system’s voltage and current requirements. Series wiring is ideal for higher voltage needs, while parallel wiring suits lower voltage applications with higher current demands. Assessing your energy goals and environmental conditions helps determine the optimal setup for efficient solar energy production and reliability.
Safety Precautions and Best Practices
Always handle solar panels and wiring with caution. Use appropriate tools and follow safety guidelines to avoid electrical hazards. Regular inspections ensure system reliability and prevent potential risks.
4.1 Safety Guidelines for Handling Solar Panels and Wiring
Always disconnect power sources before handling wiring. Wear protective gear like gloves and safety glasses. Ensure panels are securely mounted to avoid structural stress. Use insulated tools to prevent electrical shocks. Regularly inspect wires for damage or wear. Follow manufacturer guidelines for safe installation and maintenance to minimize risks and ensure system longevity.
4.2 Tools and Materials Needed for Safe Installation
Essential tools include multimeters, wire cutters, and insulated screwdrivers. Materials like solar cables, connectors, and fuses are critical. Use protective gear such as gloves and safety glasses. Ensure all components meet safety standards. Proper tools and materials ensure a secure and efficient solar panel wiring setup, preventing potential hazards.
4.3 Common Mistakes to Avoid in Solar Panel Wiring
Avoid incorrect connections, such as reversing positive and negative terminals. Ensure proper wire sizing and secure all connections tightly. Overlooking fuse and circuit breaker ratings can lead to system damage. Always follow the wiring diagram and manufacturer guidelines to prevent electrical hazards and ensure system efficiency and safety.

Step-by-Step Solar Panel Wiring Guide
Connect solar panels to the charge controller, then to the battery bank, and finally to the inverter. Ensure proper polarity and secure all connections. Use appropriate tools and diagrams for accuracy, and always follow safety protocols to ensure a reliable and efficient solar energy system setup.
5.1 Connecting Solar Panels to the Charge Controller
Start by connecting the solar panel’s positive wire to the charge controller’s positive terminal and the negative wire to the negative terminal. Ensure secure connections using screws or terminals. Verify the charge controller’s input specifications match the solar panel’s voltage and current ratings. Use appropriate gauge wire to minimize power loss. Double-check polarity to avoid damage. Always follow the manufacturer’s wiring diagram for accuracy and safety. Use tools like multimeters to verify voltage before finalizing connections. Properly secured and matched connections ensure efficient energy transfer and system reliability.
5.2 Wiring the Charge Controller to the Battery Bank
Connect the charge controller’s output terminals to the battery bank. Ensure the positive wire from the controller links to the battery’s positive terminal and the negative wire to the negative terminal. Use appropriate screws or terminals for secure connections. Verify the battery bank’s voltage and current ratings match the charge controller’s output specifications. Choose the correct wire gauge to minimize resistance and power loss. Double-check polarity to prevent damage or malfunction. Refer to the wiring diagram provided with your charge controller for precise connections. Proper wiring ensures efficient energy storage and system reliability, avoiding potential hazards or reduced performance.
5.3 Connecting the Battery Bank to the Inverter
Connect the battery bank’s positive terminal to the inverter’s positive input using the appropriate cable gauge. Ensure the negative terminal links securely to the inverter’s negative input. Verify polarity and use proper terminals for a safe connection. Check the inverter’s voltage and current ratings match the battery bank’s specifications. Secure all connections tightly to prevent power loss or overheating, ensuring reliable energy flow to your electrical load. Proper wiring here is essential for system safety and efficiency, avoiding potential hazards or reduced performance over time. Always refer to the inverter’s manual for specific requirements and guidelines.
5.4 Final Connections to the Electrical Load
Connect the inverter’s output to the electrical load, ensuring the positive terminal links to the load’s positive input and the negative to the negative. Verify the inverter’s output voltage and current match the load’s requirements. Use appropriate cable sizes to minimize power loss. Secure all connections firmly to avoid overheating or arcing. Double-check the wiring diagram and inverter manual for specific load connection guidelines. Proper termination ensures safe and efficient energy delivery to your appliances, completing the solar panel wiring setup effectively.
Testing and Commissioning the Solar Panel System
Testing ensures your solar system operates safely and efficiently. Measure voltage, current, and verify all components function together seamlessly. Monitor performance metrics for optimal energy production.
6.1 Checking Voltage and Current Outputs
Verify the system’s electrical performance by measuring voltage and current outputs. Use a multimeter to ensure readings match the manufacturer’s specifications. Check for proper functionality under varying conditions. This step ensures safety and efficiency, confirming the system operates within designated parameters. Accurate measurements are essential for reliable energy production.
6.2 Ensuring Proper Functionality of All Components
Test each component, including solar panels, inverters, and batteries, to confirm they operate as intended. Use a multimeter to verify voltage and current outputs. Ensure all connections are secure and functioning correctly. This step helps identify potential issues early, ensuring the system performs efficiently and safely.
6.3 Monitoring System Performance
Regularly monitor your solar system’s performance to ensure efficiency and safety. Use monitoring systems and tools to track voltage, current, and overall energy production. Check for consistent output and make adjustments as needed to optimize performance and maintain reliable energy supply over time.
Troubleshooting Common Wiring Issues
Troubleshooting solar wiring involves identifying faulty connections, low voltage, and inverter malfunctions. Systematically check each component, diagnose issues, and resolve them promptly for optimal performance and safety.
7.1 Identifying and Fixing Faulty Connections
Identify faulty connections by checking for loose wires, corrosion, or signs of wear. Use a multimeter to test continuity and voltage drops. Tighten or replace faulty connectors promptly to ensure reliable power flow and system efficiency, preventing energy loss and potential safety hazards.
7.2 Diagnosing Low Voltage or Power Output
Low voltage or power output can stem from faulty wiring, malfunctioning inverters, or improper panel connections. Check for loose terminals, damaged cables, or failing components. Use a multimeter to verify voltage levels and ensure all components are functioning correctly to restore optimal system performance and energy production.
7.3 Resolving Inverter or Charge Controller Malfunctions
Inverter or charge controller issues can disrupt energy flow. Check for faulty inputs, output failures, or overcharge protection triggers. Use a multimeter to verify voltage and current readings. Ensure proper connections and settings. If problems persist, consider replacing faulty components or updating software for optimal performance and system reliability.
Maintenance and Optimization of the Wiring System
Regular inspections and cleaning ensure optimal performance. Check connections, remove debris, and upgrade components as needed. Maintenance enhances efficiency, reliability, and system longevity.
8.1 Regular Inspection of Wiring and Connections
Regular inspection of wiring and connections is essential for maintaining system efficiency; Check for loose connections, frayed wires, and corrosion. Ensure terminals are secure and clean. Inspect solar panels for debris and damage. Address issues promptly to prevent power loss and potential hazards, ensuring long-term reliability and performance.
8.2 Cleaning and Upgrading Components as Needed
Regularly clean solar panels and wiring to remove dirt and debris, ensuring maximum energy absorption. Inspect connectors and terminals for wear or corrosion. Upgrade components like inverters or charge controllers to improve efficiency. Replace worn-out wires and fuses to maintain system performance and reliability over time.
8.3 Optimizing System Efficiency Over Time
Monitor system performance regularly to identify areas for improvement. Adjust wiring configurations to maximize energy output. Use smart technologies to track and optimize energy flow. Perform routine checks to ensure all components are functioning efficiently, and upgrade as needed to maintain peak performance and adapt to changing energy demands.

Advanced Solar Panel Wiring Configurations
Explore advanced wiring setups, including hybrid systems, smart technologies, and innovative configurations. These solutions enhance efficiency, adaptability, and scalability for modern solar energy applications.
9.1 Hybrid Systems: Combining Solar with Other Energy Sources
Hybrid systems integrate solar panels with other energy sources like wind or batteries. This setup ensures continuous power supply, especially during periods of low sunlight. It enhances reliability and reduces dependency on a single energy source, making it ideal for off-grid and remote applications.
9.2 Smart Wiring Solutions for Modern Solar Systems
Smart wiring solutions optimize solar system performance through advanced monitoring and control. Modern inverters and lithium-ion batteries integrate seamlessly, enabling real-time energy tracking and remote adjustments. These systems enhance efficiency, reduce energy waste, and allow integration with smart home devices for a fully connected energy solution.
9.3 Future Trends in Solar Panel Wiring Technology
Future trends include advanced smart inverters, AI-driven monitoring, and IoT integration. High-efficiency wiring materials and modular designs will enhance scalability. Energy storage systems will improve reliability, while decentralized grids and smart homes further optimize solar energy use, ensuring cleaner and more sustainable power solutions.
This guide provides a comprehensive overview of solar panel wiring, emphasizing safety, efficiency, and reliability. Proper installation ensures optimal energy harnessing, making solar power accessible and sustainable for everyone.
10.1 Summary of Key Concepts
This guide covered solar panel wiring essentials, including series and parallel connections, component roles, safety practices, and troubleshooting. Proper installation and maintenance ensure efficiency, reliability, and safety, while diagrams provided clear visual guidance for various setups, from residential to RV systems, making solar energy accessible and sustainable for all users.
10.2 Encouragement for DIY Solar Panel Wiring
Embrace the empowerment of DIY solar panel wiring! With proper guides and safety precautions, you can achieve a cost-effective, reliable setup. The satisfaction of harnessing renewable energy while reducing expenses is rewarding. Start small, follow detailed diagrams, and gradually expand your system for a sustainable future.