-
By:
- cierra
- No comment
brother lx2500 sewing machine manual
Brother LX2500 Sewing Machine Manual: A Comprehensive Guide
This guide offers detailed instructions for the Brother LX2500‚ available in English and Spanish. Download the PDF manual‚ find local dealers‚ and access Brother’s support resources.
The Brother LX2500 is a popular sewing machine‚ particularly well-suited for both beginner and experienced sewers tackling garment construction and various craft projects. This machine boasts a user-friendly design coupled with a robust set of features‚ making it a versatile addition to any sewing space.
This manual serves as a comprehensive resource‚ guiding you through every aspect of operating and maintaining your LX2500. It details the machine’s capabilities‚ from basic threading and stitch selection to more advanced techniques like buttonhole creation and zipper insertion.
Available resources include downloadable PDF versions of the manual‚ facilitating easy access on multiple devices. Furthermore‚ the manual is offered in both English and Spanish‚ broadening its accessibility. Brother’s official website and a network of local dealers provide additional support and assistance should you require it. Understanding this manual will unlock the full potential of your LX2500.
Understanding the Manual’s Contents
This Brother LX2500 manual is structured to provide a clear and logical progression of information. It begins with essential safety precautions and then guides you through initial setup‚ including unboxing and identifying machine parts. Subsequent sections detail the threading process – both upper thread and bobbin winding – and proper bobbin insertion.
A significant portion is dedicated to stitch selection and adjustment‚ explaining various stitch patterns and how to modify stitch length and width. The manual also covers advanced techniques like reverse stitching‚ buttonhole sewing‚ and zipper insertion.
Crucially‚ it includes a dedicated section on maintenance‚ outlining cleaning procedures‚ lubrication points‚ and troubleshooting common issues. Downloadable PDF versions are readily available‚ and the manual’s content is presented in both English and Spanish for broader understanding and usability.
Safety Precautions
Before operating your Brother LX2500‚ carefully review all safety precautions outlined in the manual. Always disconnect the power supply when threading‚ changing the needle‚ cleaning‚ or performing any maintenance. Keep fingers away from moving parts‚ particularly the needle and presser foot‚ to prevent injury.
Never use the machine if it is damaged or malfunctioning. Ensure the machine is placed on a stable‚ level surface during operation. Do not attempt to repair the machine yourself; contact a qualified technician for assistance. Keep the machine out of reach of children.
Always use the correct voltage and frequency as specified on the machine’s label. Avoid using excessive force when operating the machine. Read the manual thoroughly to understand all safety guidelines and operating procedures before use.
Getting Started with Your LX2500
Begin by unpacking and setting up your LX2500. Identify all machine parts‚ power it on‚ and familiarize yourself with basic operational functions for successful sewing.
Unboxing and Initial Setup
Carefully remove your Brother LX2500 sewing machine from its packaging‚ ensuring all components are present. Inspect the machine for any visible damage that may have occurred during shipping. Retain the original packaging for potential future transport or storage. Locate and remove all protective materials‚ including foam inserts and plastic coverings.
Initial setup involves attaching the power cord and ensuring the machine is placed on a stable‚ level surface. Confirm the voltage compatibility with your local power supply. Familiarize yourself with the basic layout of the machine‚ noting the positions of key controls and components. Before first use‚ gently wipe down the exterior surfaces with a soft‚ dry cloth to remove any dust or debris accumulated during storage and transport. Prepare for threading and operation by ensuring a comfortable and well-lit workspace.
Machine Parts Identification
The Brother LX2500 features several key components. Identify the power switch‚ located for easy access‚ and the foot pedal‚ essential for controlling sewing speed. Locate the bobbin winder‚ used to prepare bobbins for sewing. Recognize the stitch selection dial‚ allowing you to choose various stitch patterns. Note the stitch length and width adjustment dials‚ crucial for customizing your stitches.
Familiarize yourself with the presser foot lever‚ which raises and lowers the presser foot. Identify the reverse stitch lever‚ enabling backstitching for secure seams. Understand the tension dial’s function‚ controlling thread tension for optimal stitch quality. Locate the spool pin‚ holding the thread spool in place. Recognize the needle clamp screw‚ securing the needle. Knowing these parts is vital for successful operation and maintenance.
Powering On and Basic Operation
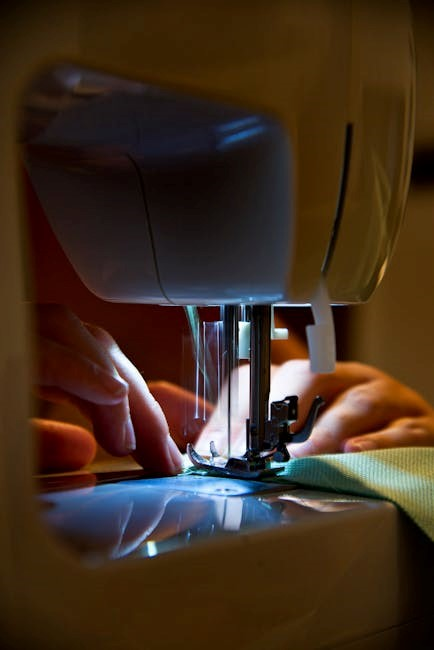
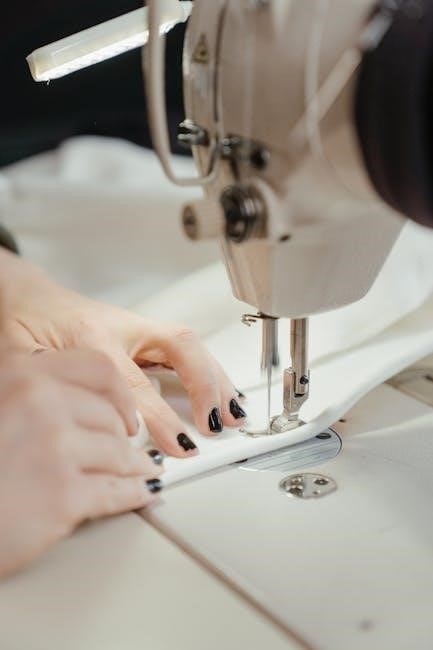
To begin‚ ensure the machine is plugged into a grounded outlet. Turn the power switch to the ‘On’ position; a light will illuminate. Place fabric under the presser foot‚ gently lowering it using the lever. Depress the foot pedal to start sewing; the speed is directly proportional to pedal pressure. Use the reverse stitch lever for backstitching at the beginning and end of seams.
Practice sewing on scrap fabric to get accustomed to the machine’s rhythm. Maintain a consistent speed for even stitches. Observe the stitch formation‚ ensuring the upper and bobbin threads interlock correctly. Adjust the speed as needed for different fabric types and stitch patterns. Always turn off and unplug the machine when not in use.
Threading the Machine
Learn to thread both the upper thread and the bobbin correctly. Follow the diagram in the manual for proper threading paths and techniques.
Threading the Upper Thread
Successfully threading the upper thread on your Brother LX2500 is crucial for proper stitch formation. Begin by ensuring the machine is turned off. Raise the presser foot; this opens the tension discs‚ allowing the thread to seat correctly. Guide the thread from the spool‚ through the first thread guide‚ and then around the tension discs.
Next‚ lead the thread through the take-up lever – ensure it goes inside the hook. Continue threading through the remaining thread guides‚ following the numbered diagram in your manual. Finally‚ thread the needle from front to back. Pull a few inches of thread through the needle eye. Incorrect threading can cause skipped stitches or tension issues‚ so double-check each step against the manual’s illustrations. Refer to online tutorials for visual guidance if needed.
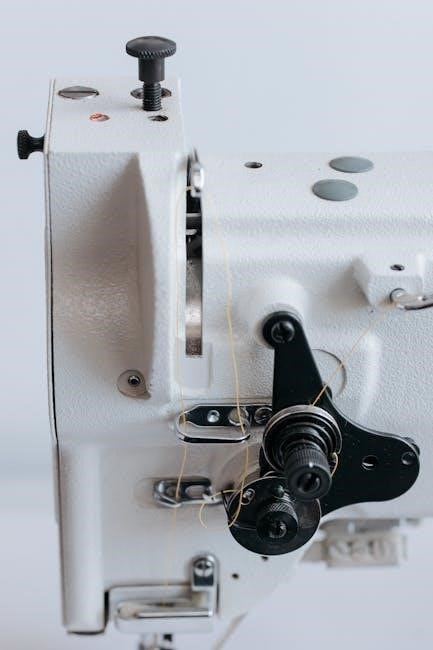
Winding the Bobbin
Properly winding the bobbin is essential for consistent sewing with your Brother LX2500. Place the spool of thread onto the spool pin. Guide the thread through the thread guide‚ then wrap it several times around the bobbin‚ clockwise. Insert the bobbin onto the bobbin winder spindle‚ ensuring it clicks into place.
Engage the bobbin winder by pushing the bobbin winder lever to the right. Press the foot pedal gently to start winding. The machine will automatically stop when the bobbin is full. Remove the bobbin and trim the thread. Avoid overfilling the bobbin‚ as this can cause issues. Consult your manual’s diagram for a visual guide to ensure correct winding technique. Consistent bobbin winding leads to even stitch quality.
Inserting the Bobbin
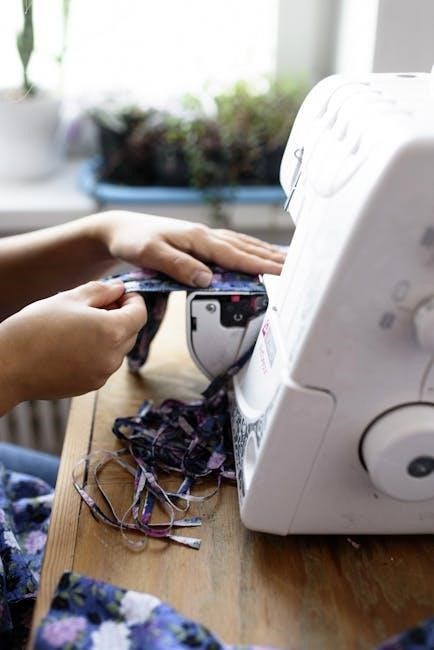
Correct bobbin insertion is crucial for the Brother LX2500’s operation. Open the bobbin cover located beneath the needle plate. Gently pull out the bobbin case. Insert the wound bobbin into the bobbin case‚ ensuring the thread unwinds in a clockwise direction. Guide the thread through the tension spring on the bobbin case.
Reinsert the bobbin case back into the machine‚ ensuring it clicks securely into place. Draw up a few inches of the bobbin thread through the slot. Close the bobbin cover. Proper insertion ensures even thread distribution. Refer to the manual’s illustrations for a clear visual guide. Incorrect insertion can lead to skipped stitches or thread bunching.
Stitch Selection and Adjustment
Explore diverse stitch patterns‚ adjust length and width‚ and perform test sewing. Evaluate stitches for optimal results with your Brother LX2500 machine.
Understanding Stitch Patterns
The Brother LX2500 boasts a variety of stitch patterns designed for diverse sewing projects. Familiarizing yourself with these options is crucial for achieving professional results. The manual details each stitch‚ explaining its ideal application – from straight stitches for basic seams to zigzag stitches for finishing raw edges and decorative stitches for embellishment.
Different stitch patterns offer varying degrees of elasticity and strength. Understanding these characteristics allows you to select the most appropriate stitch for your fabric type and project requirements. For example‚ a stretch stitch is essential when working with knit fabrics‚ while a reinforced stitch is ideal for areas requiring extra durability‚ like stress points on garments. The manual provides clear diagrams and explanations to help you differentiate between stitch types and their intended uses. Experimenting with different patterns on scrap fabric is highly recommended to build confidence and explore creative possibilities.
Adjusting Stitch Length and Width
Precise control over stitch length and width is fundamental to successful sewing with the Brother LX2500. The manual illustrates how to use the dedicated dials to modify these settings‚ impacting the appearance and strength of your seams. Shorter stitch lengths are ideal for delicate fabrics and curves‚ providing greater control and preventing puckering‚ while longer stitch lengths are suitable for basting or heavier materials.
Adjusting stitch width primarily affects zigzag stitches and decorative patterns. A narrower width creates a denser‚ more secure stitch‚ while a wider width offers greater coverage and visual impact. The manual emphasizes the importance of testing different combinations on scrap fabric before starting your project; Proper adjustment ensures that stitches lay flat‚ are evenly spaced‚ and complement the fabric and design. Experimentation is key to mastering these controls and achieving professional-looking results.
Test Sewing and Stitch Evaluation
Before embarking on your project‚ the Brother LX2500 manual strongly advises thorough test sewing. Utilize scrap fabric identical to your intended material to assess stitch quality and tension. Evaluate for skipped stitches‚ looping‚ or unevenness – indicators of improper settings. Adjust stitch length‚ width‚ and thread tension as needed‚ repeating the test until optimal results are achieved.
The manual highlights the importance of examining both sides of the fabric. A well-sewn stitch should be consistent and smooth on both surfaces. Pay close attention to corners and curves‚ ensuring clean and accurate stitching. This preliminary step prevents costly errors and ensures a professional finish. Consistent evaluation throughout the sewing process guarantees a high-quality‚ durable outcome‚ maximizing the potential of your Brother LX2500.
Advanced Features & Techniques
Explore reverse stitching‚ buttonhole creation‚ and zipper insertion with the LX2500. The manual provides detailed guidance for these techniques‚ enhancing your sewing capabilities.
Using the Reverse Stitch
The reverse stitch function on the Brother LX2500 is crucial for securing seams at the beginning and end of a sewing line. This prevents unraveling and ensures a durable finish. To engage the reverse stitch‚ locate the dedicated reverse lever or button – its position may vary slightly depending on the specific LX2500 model.
Typically‚ pressing and holding this lever/button while sewing will automatically switch the machine into reverse. Release it to return to forward stitching. Some models offer a reverse stitch setting allowing you to pre-determine the length of the reverse stitching. Experiment with different reverse stitch lengths on scrap fabric to find what works best for your projects.
Remember to always begin and end your seams with a short burst of reverse stitching – approximately a quarter to half an inch is usually sufficient. Consistent use of the reverse stitch will significantly improve the quality and longevity of your sewn items. Refer to the manual for visual diagrams and specific instructions tailored to your LX2500.
Buttonhole Sewing
The Brother LX2500 simplifies buttonhole creation with its automated buttonhole function. Begin by selecting the appropriate buttonhole stitch pattern on the machine’s stitch selection dial. Ensure you’ve attached the buttonhole foot – this specialized foot guides the fabric for a neat‚ consistent result.
Next‚ measure the diameter of the button you’ll be using. Adjust the buttonhole length setting on the machine to match this measurement. Test the buttonhole on a scrap fabric piece before sewing on your final garment. The LX2500 will typically sew a pre-determined number of stitches‚ then pause‚ allowing you to adjust the fabric if needed.
Follow the manual’s instructions carefully for completing the buttonhole – it usually involves pivoting the fabric and continuing to sew. Practice makes perfect; mastering the buttonhole function will elevate your sewing projects significantly.
Zipper Insertion
Inserting a zipper with the Brother LX2500 requires a zipper foot‚ which allows you to sew close to the zipper teeth. Select the appropriate zipper foot and attach it to the machine. Begin by pinning the zipper tape to the fabric‚ ensuring the zipper is partially open.
Choose a straight stitch and adjust the stitch length according to your fabric type. Start sewing along one side of the zipper tape‚ staying consistent with your seam allowance. Slowly guide the fabric‚ keeping the zipper teeth aligned with the edge of the foot.
Repeat on the other side of the zipper tape. For a professional finish‚ consider using a coordinating thread color. The manual provides detailed diagrams illustrating the correct technique for various zipper applications‚ including centered and lapped zippers.
Maintenance and Troubleshooting
Regular cleaning and lubrication are vital for optimal performance. Address common issues like thread jams or skipped stitches using the manual’s solutions.
Cleaning the Machine
Maintaining a clean Brother LX2500 sewing machine is crucial for its longevity and performance. Dust‚ lint‚ and stray threads can accumulate within the machine‚ hindering its operation and potentially causing malfunctions. Regular cleaning prevents these issues. Always disconnect the power cord before beginning any cleaning procedure for safety.
Use a soft brush‚ often included with the machine‚ to remove lint from the bobbin area‚ feed dogs‚ and around the needle plate. A small vacuum cleaner with a brush attachment can also be helpful. Avoid using compressed air‚ as it can blow dust further into the machine. Wipe the exterior surfaces with a slightly damp cloth. Never use harsh chemicals or abrasive cleaners‚ as they can damage the finish. Pay close attention to areas where oil is applied‚ as dust tends to collect there. Consistent cleaning ensures smooth and reliable sewing.
Oil Points and Lubrication
Proper lubrication is essential for the smooth operation of your Brother LX2500 sewing machine. Regular oiling reduces friction‚ prevents wear‚ and ensures consistent stitch quality. Refer to your manual for specific oil points‚ typically located around the bobbin area‚ hook mechanism‚ and presser foot bar. Use only sewing machine oil; other lubricants can damage the internal components.
Apply oil sparingly‚ using an oiler or a small brush. Avoid over-oiling‚ as excess oil can attract dust and create a sticky residue. Wipe away any excess oil with a clean cloth. Frequency of oiling depends on usage; more frequent use requires more frequent lubrication. Inspect oil points regularly and re-oil as needed. Consistent lubrication extends the life of your machine and maintains optimal performance.
Common Problems and Solutions
Encountering issues with your Brother LX2500 is common‚ but many are easily resolved. Thread bunching often indicates incorrect threading or improper tension. Re-thread the machine carefully‚ ensuring the thread is seated correctly in all guides and the tension dial is appropriately adjusted. Skipped stitches can result from a dull or incorrect needle; replace it with a new‚ suitable needle for your fabric.
Bobbin issues‚ like thread nests‚ usually stem from incorrect bobbin insertion or winding. Ensure the bobbin is wound evenly and inserted correctly. If the machine jams‚ stop immediately‚ remove the fabric‚ and carefully clear any tangled threads. Consult the manual for detailed troubleshooting steps and diagrams. Regular maintenance prevents many problems‚ ensuring a smooth sewing experience.
Resources and Support
Download the LX2500 manual in PDF format‚ locate a nearby authorized Brother dealer‚ and visit the official Brother support website for assistance.
Downloading the Manual (PDF)
Accessing a digital copy of the Brother LX2500 sewing machine manual is remarkably straightforward. Several online repositories offer the manual for free download in PDF format. The Manual Library‚ for instance‚ hosts versions uploaded by users like chris85‚ dating back to August 31‚ 2020‚ and updated as recently as January 16‚ 2022.
These PDF versions provide a convenient way to consult the instructions without needing the physical booklet. You can easily search within the document for specific topics or troubleshooting advice; Furthermore‚ the availability of both English and Spanish versions caters to a wider audience. Ensure you download from reputable sources to avoid potentially corrupted or malicious files. A quick online search for “Brother LX2500 manual PDF” will yield numerous download links‚ allowing you to quickly obtain the necessary documentation for your sewing machine.
Finding a Local Dealer
Locating an authorized Brother dealer for the LX2500 sewing machine is easily achievable through Brother’s official website. Brother-USA provides a dedicated Dealer Locator tool‚ allowing users to search for nearby retailers based on their location. This ensures you purchase your machine – or any necessary accessories – from a trusted source offering genuine Brother products and support.
Utilizing the Dealer Locator is recommended over purchasing from unverified online marketplaces. Authorized dealers can provide expert advice‚ machine demonstrations‚ and valuable after-sales service‚ including repairs and maintenance. They can also assist with threading questions and stitch selection. The website link‚ http://www.brother-usa.com/homesewing/DealerLocator.aspx‚ directs you to the official tool‚ streamlining the process of finding a convenient and reliable local dealer for all your Brother sewing needs.
Brother Support Website
Brother’s comprehensive support website serves as a central hub for LX2500 users seeking assistance. It offers a wealth of resources‚ including frequently asked questions (FAQs)‚ troubleshooting guides‚ and downloadable manuals in PDF format. Users can access detailed information regarding machine operation‚ stitch selection‚ and maintenance procedures.
The website provides access to instructional videos demonstrating essential techniques‚ such as threading the machine and winding the bobbin. Furthermore‚ it features a dedicated support section where users can submit inquiries directly to Brother’s customer service team. This ensures prompt and personalized assistance with any challenges encountered while using the LX2500. Exploring the Brother support website is a valuable first step in resolving issues and maximizing your sewing experience.