
-
By:
- cierra
- No comment
canon pixma mx922 printer manual
Canon PIXMA MX922 Printer Manual: A Comprehensive Guide
This manual provides detailed instructions for setting up‚ using‚ and troubleshooting your Canon PIXMA MX922 printer‚
covering everything from initial setup to advanced features and common issue resolutions‚ ensuring optimal performance.
The Canon PIXMA MX922 is a versatile all-in-one inkjet printer designed for home and small office use‚ offering a blend of functionality and quality. This printer excels in document handling‚ photo printing‚ scanning‚ and copying‚ making it a central hub for various tasks. It boasts a user-friendly interface‚ enhanced connectivity options – including Wi-Fi and Ethernet – and a robust feature set to cater to diverse printing needs.
This manual serves as a comprehensive resource‚ guiding you through every aspect of the MX922’s operation. Whether you’re a first-time user or seeking to unlock advanced capabilities‚ this guide provides clear‚ step-by-step instructions. We’ll cover everything from initial setup and driver installation to utilizing its advanced printing features and resolving common issues. Prepare to maximize your printing experience with the Canon PIXMA MX922!
Key Features and Specifications
The Canon PIXMA MX922 boasts impressive specifications‚ including a maximum print resolution of 9600 x 2400 dpi for exceptionally detailed photos. It supports printing from various sources like memory cards‚ USB drives‚ and mobile devices via Canon’s PRINT app. The printer features a 3.5-inch touchscreen LCD for easy navigation and control.
Key features include automatic duplex printing‚ saving paper and reducing costs‚ and borderless printing for stunning‚ edge-to-edge photos. Its Automatic Document Feeder (ADF) simplifies scanning and copying multiple pages. Connectivity options encompass Wi-Fi‚ Ethernet‚ and USB. Print speeds reach approximately 15.4 images per minute (ipm) for black and white and 9.3 ipm for color documents. This printer is designed for high-volume‚ quality output‚ making it ideal for both home and office environments.
Setting Up Your Printer
Proper setup ensures optimal performance; this section guides you through unboxing‚ driver installation‚ and network connection for seamless printing experiences.
Unboxing and Initial Setup
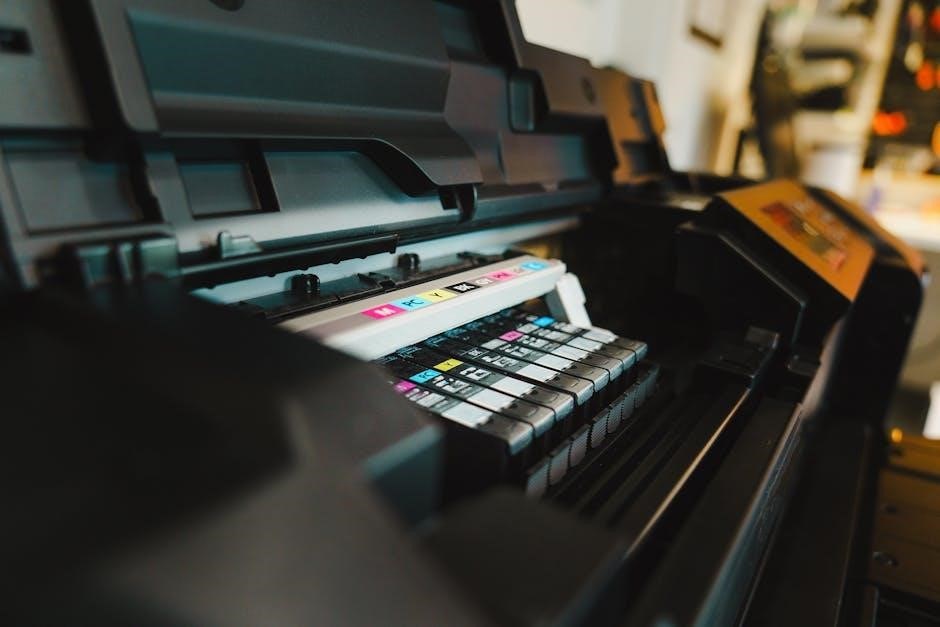
Carefully unpack your Canon PIXMA MX922‚ ensuring all components are present: the printer itself‚ power cord‚ print head‚ ink cartridges‚ setup CD-ROM‚ and documentation. Remove all protective tape and packaging materials‚ both inside and outside the printer.
Place the printer on a stable‚ level surface with adequate ventilation. Connect the power cord to the printer and a grounded electrical outlet. Do not turn the printer on yet! Install the ink cartridges following the on-screen instructions provided in the setup guide. The printer will then initiate a preliminary setup process‚ which may include aligning the print head for optimal print quality. This initial alignment is crucial for sharp‚ clear results. Refer to the included quick start guide for visual aids and step-by-step instructions.
Installing Drivers and Software
Insert the provided CD-ROM into your computer‚ or download the latest drivers and software from the official Canon website. Running the downloaded file will initiate the installation process. Follow the on-screen prompts‚ accepting the license agreement and choosing your preferred installation options.
The software suite includes essential components like the printer driver‚ scanner driver‚ and Canon utilities for managing your printer. During installation‚ you may be prompted to connect the printer to your computer via USB cable. Ensure a secure connection. The installer will automatically detect the printer and configure the necessary settings. After installation‚ restart your computer to complete the process. Verify successful installation by printing a test page from within the Canon software.
Connecting to a Network (Wi-Fi & Ethernet)
For Wi-Fi connectivity‚ access the printer’s setup menu on the LCD screen and navigate to the network settings. Select your wireless network from the available list and enter the password when prompted. Ensure your printer is within range of your Wi-Fi router for a stable connection. Alternatively‚ use WPS (Wi-Fi Protected Setup) for a simplified connection process by pressing the WPS button on both your printer and router.
For Ethernet connection‚ connect one end of an Ethernet cable to the printer’s Ethernet port and the other end to an available port on your router. The printer will automatically obtain an IP address. Verify the connection through the printer’s network settings menu. Once connected‚ you can print and scan wirelessly from devices on your network.

Understanding the Control Panel
The Canon PIXMA MX922’s control panel features an intuitive LCD screen and buttons‚ providing easy access to printer functions and settings for seamless operation.
LCD Screen Navigation
The Canon PIXMA MX922 boasts a color LCD screen that serves as the central hub for navigating the printer’s functions. The main display presents options for printing‚ scanning‚ copying‚ and accessing the printer’s setup menu. Utilize the directional buttons – typically up‚ down‚ left‚ and right – to highlight desired options on the screen. Pressing the ‘OK’ or ‘Select’ button confirms your choice and enters the corresponding menu.
Within the setup menu‚ you’ll find settings for network configuration‚ paper size‚ print quality‚ and maintenance tasks like print head alignment and nozzle checks. The LCD screen also displays status information‚ including ink levels‚ paper supply‚ and any error messages. Familiarize yourself with the screen’s layout to quickly access frequently used features and troubleshoot potential issues. The screen’s brightness can often be adjusted within the settings for optimal viewing;
Button Functions Explained
The Canon PIXMA MX922’s control panel features several dedicated buttons‚ each serving a specific purpose. The ‘Power’ button‚ unsurprisingly‚ turns the printer on and off. The ‘Black’ and ‘Color’ buttons initiate printing using the respective ink cartridges. The ‘Stop’ button halts any ongoing print‚ scan‚ or copy jobs. The ‘Scan’ button directly starts the scanning process‚ while the ‘Copy’ button initiates document duplication.
Additional buttons‚ often represented by icons‚ control features like duplex printing‚ wireless setup‚ and access to the printer’s menu. The directional buttons navigate the LCD screen‚ as previously described‚ and the ‘OK’ button confirms selections. Holding certain buttons down for a few seconds may activate specific functions‚ such as paper jam release or factory reset. Refer to the printer’s on-screen help or detailed manual for a complete list of button combinations and their corresponding actions.
Status Indicators and Alerts
The Canon PIXMA MX922 utilizes a series of status indicators – lights and on-screen messages – to communicate its operational state. Solid lights generally indicate normal operation‚ while blinking lights signify specific conditions requiring attention. For instance‚ a blinking orange light often signals a paper jam‚ low ink levels‚ or an error condition.
The LCD screen displays detailed alerts and error codes‚ providing more specific information about the issue. Common alerts include “Paper Out‚” “Ink Low‚” and “Service Required.” Error codes‚ typically numerical‚ correspond to specific malfunctions detailed in the printer’s manual or Canon’s support website. Regularly checking the status indicators and responding promptly to alerts can prevent more serious problems and ensure consistent printing performance. Ignoring these signals may lead to reduced print quality or complete printer failure.

Printing Basics
This section details fundamental printing procedures for the Canon PIXMA MX922‚ covering paper loading‚ document printing‚ and photo printing for excellent results.
Loading Paper Correctly
Proper paper loading is crucial for successful printing with your Canon PIXMA MX922. First‚ locate the paper tray and extend it fully. Adjust the paper guides to match the width of your paper‚ ensuring they aren’t too tight or loose.
Fan the stack of paper to prevent sheets from sticking together‚ then load it into the tray with the printable side facing down. Avoid overfilling the tray; adhere to the maximum paper capacity indicated by the markings.
For specialty papers like photo paper‚ select the appropriate paper type in the printer settings to optimize print quality. Always ensure the paper is flat and free of wrinkles or tears before loading. Incorrect paper loading can lead to paper jams or poor print results‚ so careful attention to these steps is essential for consistent‚ high-quality output.
Printing Documents (Standard Quality)
To print documents in standard quality with your Canon PIXMA MX922‚ begin by opening the document you wish to print from your computer. Navigate to the “File” menu and select “Print.” In the print dialog box‚ choose the Canon PIXMA MX922 as your printer.
Under “Print Quality‚” select “Standard” for everyday documents. Adjust the number of copies as needed. You can also choose options like two-sided printing (duplex) to save paper.

Confirm your settings and click “Print.” The printer will automatically adjust ink usage and print speed for optimal standard quality. For best results‚ use plain paper recommended for inkjet printers. This setting balances speed and quality‚ making it ideal for drafts‚ reports‚ and general correspondence.
Printing Photos (High Quality)
Achieving high-quality photo prints with your Canon PIXMA MX922 requires specific settings. Open the desired photo from your computer and select “File” then “Print.” Choose the Canon PIXMA MX922 printer. In the print dialog box‚ navigate to “Print Quality” and select “High.”
Crucially‚ select the appropriate paper type – glossy photo paper is recommended for vibrant colors and sharp details. Under “Media Type‚” choose the corresponding paper setting.
Enable “Photo Enhance” for automatic image adjustments. Consider using “Color Matching” for accurate color reproduction. Printing high-quality photos will take longer and consume more ink‚ but the results will be significantly improved. Ensure you’re using genuine Canon ink for optimal performance and longevity of your prints.
Advanced Printing Features
Explore the PIXMA MX922’s capabilities beyond basic printing‚ including duplex‚ borderless‚ and mobile printing options‚ enhancing versatility and convenience for diverse printing needs.
Duplex Printing (Two-Sided)
The Canon PIXMA MX922 offers convenient automatic duplex printing‚ allowing you to print on both sides of the paper‚ reducing paper consumption and saving costs. To enable this feature‚ access the print settings dialog box from your computer. Locate the “Layout” or “Finishing” tab‚ and select the “Two-Sided Printing” option.
You’ll typically have choices for the binding edge – long-edge binding (like a book) or short-edge binding (like a calendar). Select the appropriate option based on your document’s intended format. Ensure your paper is suitable for duplex printing; thinner paper may require adjustments to prevent show-through. The printer will automatically flip the paper over to print on the reverse side.
Confirm the settings before initiating the print job. Duplex printing is an environmentally friendly and cost-effective way to produce professional-looking documents‚ reports‚ and other materials with the Canon PIXMA MX922.
Borderless Printing
The Canon PIXMA MX922 excels at producing stunning borderless prints‚ ideal for photographs and images where maximizing the print area is crucial. To activate borderless printing‚ navigate to the print settings within your application; Select the paper size and quality settings first‚ then locate the “Layout” tab or a similar section.
Within the layout options‚ you should find a “Borderless” checkbox or setting. Enable this option‚ and the printer will automatically extend the image to the edges of the paper. Note that not all paper types and sizes support borderless printing; the available options will be displayed in the settings.
Using genuine Canon photo paper is highly recommended for optimal results. Ensure sufficient margins are not present in your original image to avoid cropping during the borderless printing process. This feature delivers professional-quality‚ edge-to-edge prints with your MX922.
Printing from Mobile Devices
The Canon PIXMA MX922 offers convenient mobile printing capabilities‚ allowing you to print directly from your smartphones and tablets. Canon provides several methods for achieving this‚ including Canon PRINT Inkjet/SELPHY and Apple AirPrint. Download the Canon PRINT app from your device’s app store and follow the on-screen instructions to connect to your MX922 via Wi-Fi.
Once connected‚ you can print photos‚ documents‚ and web pages directly from your mobile device. AirPrint allows seamless printing from Apple devices without needing to install any additional apps. Ensure your mobile device and printer are connected to the same Wi-Fi network for successful printing.
The Canon PRINT app also supports scanning to your mobile device‚ adding further versatility. Explore the app’s features to customize print settings and enjoy effortless mobile printing with your MX922.

Scanning and Copying
This section details how to effectively scan documents and photos‚ and create copies‚ utilizing the Canon PIXMA MX922’s features for optimal results and efficiency.
Scanning Documents and Photos
The Canon PIXMA MX922 offers versatile scanning capabilities for both documents and photographs. To initiate a scan‚ place your document face down on the scanner glass‚ ensuring it aligns with the indicated guidelines. Utilize the printer’s control panel to select the appropriate scan settings‚ including resolution (DPI)‚ color mode (color‚ grayscale‚ or black & white)‚ and file format (JPEG‚ PDF‚ etc.).
For scanning photos‚ consider using a higher DPI setting to capture finer details. The MX922 also supports scanning directly to a USB drive or a computer connected via USB or network. Explore the Canon IJ Scan Utility software for advanced options like optical character recognition (OCR) to convert scanned documents into editable text. Remember to clean the scanner glass regularly for optimal scan quality‚ preventing streaks or blemishes in your scanned images.
Experiment with different settings to achieve the desired results for various scanning needs.
Copying Documents and Photos
The Canon PIXMA MX922 simplifies document and photo duplication with its integrated copying function. Begin by placing the original document or photograph face down on the scanner glass‚ aligning it with the indicated markings. Access the copy function through the printer’s control panel‚ where you can adjust key settings like copy darkness‚ copy size‚ and the number of copies desired.
The MX922 allows for both black and white and color copies. For photo copies‚ selecting a higher quality setting will yield more vibrant and detailed reproductions. You can also choose to reduce or enlarge the copied image to fit your needs. The printer automatically detects the original document type and optimizes the copy settings accordingly‚ though manual adjustments are always possible.
Ensure the paper tray is adequately loaded with appropriate paper before initiating the copy process.
Using the ADF (Automatic Document Feeder)
The Canon PIXMA MX922’s Automatic Document Feeder (ADF) streamlines multi-page scanning and copying tasks‚ eliminating the need for manual sheet feeding. To utilize the ADF‚ simply load your documents face up into the tray‚ ensuring they are neatly aligned and not overfilled. The MX922 supports copying or scanning multiple pages consecutively.
Within the printer’s control panel‚ select the ADF as the document source. You can then specify the number of copies or pages to scan. The ADF automatically pulls each sheet through the scanner‚ enabling efficient batch processing. Adjust settings like two-sided copying or scanning directly from the control panel for enhanced functionality.
Regularly check the ADF for any jammed paper and follow the printer’s instructions for safe removal.

Troubleshooting Common Issues
This section details solutions for frequent problems‚ including paper jams‚ poor print quality‚ and connectivity errors‚ guiding you through effective troubleshooting steps for your MX922.
Paper Jams and Solutions
Paper jams are a common issue‚ but easily resolved with careful attention. First‚ always power off the printer before attempting to clear a jam – this prevents potential damage. Gently remove any visible paper from the paper path‚ including the rear access cover‚ paper cassette‚ and inside the printer.
Avoid using excessive force‚ as tearing the paper can leave fragments inside‚ causing further issues. Check for small pieces of paper lodged in rollers or sensors. If the jam persists‚ consult the printer’s display panel for specific instructions and diagrams.
Ensure you are using the correct paper type and weight for your printing needs‚ and that the paper is loaded correctly in the cassette. Prevent jams by fanning the paper stack before loading to separate the sheets and avoid overfilling the cassette. Regularly cleaning the paper feed rollers can also help prevent recurring jams.
Print Quality Problems
Addressing print quality issues requires a systematic approach. If prints appear faded‚ check ink levels and ensure genuine Canon ink cartridges are installed. Run the printer’s built-in print head alignment utility to optimize nozzle performance – access this through the printer’s maintenance settings. For blurry or streaked prints‚ clean the print heads using the printer’s cleaning cycle; repeat if necessary‚ but avoid excessive cleaning to conserve ink.
Verify the paper type setting in the print driver matches the paper loaded. Incorrect settings can lead to poor print quality. Adjust print quality settings (standard‚ high) within the driver for desired results. If color accuracy is off‚ run a color calibration process.
Inspect the print heads for any physical damage or blockages. Regularly cleaning the printer and using appropriate paper will help maintain optimal print quality.
Connectivity Issues
Resolving connectivity problems begins with verifying basic connections. For Wi-Fi‚ ensure the printer is within range of the router and that the correct network password has been entered. Confirm the printer and computer are on the same network. If using Ethernet‚ check the cable connection at both ends and verify link lights are active on the printer and router.
Restart both the printer and your computer. Run the Canon printer setup utility to re-establish the connection. Check your firewall settings to ensure the printer is not being blocked. Update the printer driver to the latest version available on the Canon website.
If problems persist‚ try a network reset on the printer. Consult the Canon support website for specific troubleshooting steps related to your operating system.
Error Codes and Their Meanings
Canon PIXMA MX922 error codes provide valuable clues for diagnosing printer issues. A “B200” error typically indicates a paper feed problem‚ requiring checking for jammed paper or incorrect paper loading. “B201” suggests a tray unit error‚ potentially needing a reset or inspection of the tray mechanism.
Error code “1401” often relates to a waste ink tank full issue‚ necessitating maintenance. “5B00” signifies a printer component error‚ potentially requiring professional service. Refer to the Canon support website or the printer’s detailed error code list within the manual for a comprehensive explanation of each code.
Always note the complete error code‚ as variations can indicate different problems. Attempting recommended solutions before contacting support can often resolve minor issues quickly.